Reviving an Old Mechanical Keyboard
At Tighten, we have a slack channel dedicated to chatting about mechanical keyboards. There's a lot to be said about the noise and tactile feedback. It also makes working on the computer a bit more fun. I had been craving some of that old clicky-clacky action, but not enough to dole out the cash. Newer mechanical keyboards can clear $100. Lucky for me, I'm a Goodwill deal hunter and I was able to put one together with about $25 in parts and some elbow grease. I documented the process and I hope it inspires you.
Every time I come across a Goodwill store, I run in to check for a few categories of items, like coffee equipment, board games, and electronics. I'd grown skeptical of the keyboard selection because I had only come across cheap USB keyboards in the past.
However, when I went in recently, I found this gem.
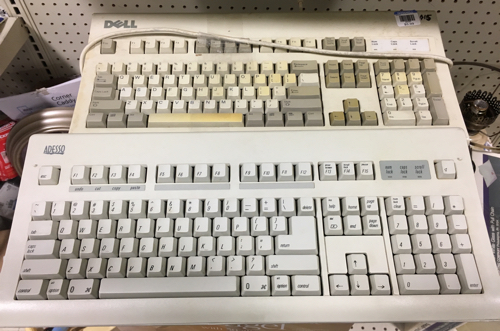
The Adesso keyboard (not the gross Dell one). The Adesso looked very similar to the keyboard I owned with my Apple II. It turns out it is a variant of the Apple Extended Keyboard. In fact, the only real difference is the chassis design. I played with the keys for a bit and I knew that I was taking it home for the hefty price of $1.99!
Even though this keyboard looked great when I brought it home, I decided to give it a really good cleaning just in case.
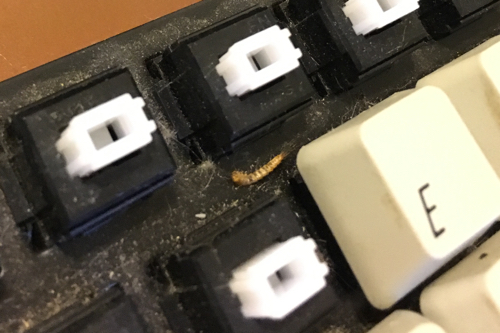
I'm glad I did because there were some rather gross things under the keys. I put the board back together after cleaning it and I went to plug it in when I realize I had hit an issue...
Before USB, Apple was using the Apple Desktop Bus (ADB) protocol to connect the keyboard and mouse to the computer. So how was I supposed to connect an ADB keyboard to my newer MacBook Pro? I could have purchased a $90+ ADB to USB adapter, but that's way out of my price range. Another option was building an adapter myself. A small research quest later, I had gained the confidence to build this thing myself!
The plan was to buy a micro controller, hook it up to the ADB terminals, flash the micro controller with some translation software, and connect the micro controller to my computer via USB. One of the more popular micro controllers is the Teensy 2.0. I ordered it for about $20 (including shipping) and waited very impatiently as it was delivered.
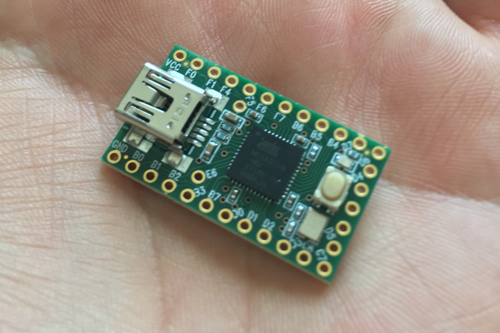
I finally received the Teensy and the next step was to flash it with the appropriate firmware. There is an amazing resource of open source Keyboard Firmware that I was able to utilize, which can be found here. If I could kiss the people who wrote this software, I would! Maybe. It depends...
Flashing the Micro Controller
Alright. Now for the really fun part!
First, I needed to install the compiler, which requires Xcode command line developer tools.
xcode-select --install
brew tap osx-cross/avr
brew install avr-gcc
Next, I needed to install the command line version of the Teensy loader. The teensy loader is the program that flashes the firmware onto the micro controller. Here are the steps I took to download the binary and move it into /usr/local/bin which was already set in my PATH variable. This is so I can call teensy_loader_cli from anywhere.
curl -O https://www.pjrc.com/teensy/teensy_loader_cli_mac.zip
unzip -a teensy_loader_cli_mac.zip
rm teensy_loader_cli_mac.zip
mv teensy_loader_cli /usr/local/bin
Next, I needed to compile the code and flash the micro controller. The firmware repo has steps specific to the Teensy. Here are the steps I took:
git clone https://github.com/tmk/tmk_keyboard.git
cd tmk_keyboard/converter/adb_usb
make -f Makefile clean
make -f Makefile.teensy [KEYMAP=plain] teensy
The last command compiled the firmware and flashed it onto the micro controller. At that point, I had a working micro controller for my keyboard, but I still needed to install it.
Time to bring out the soldering tools.
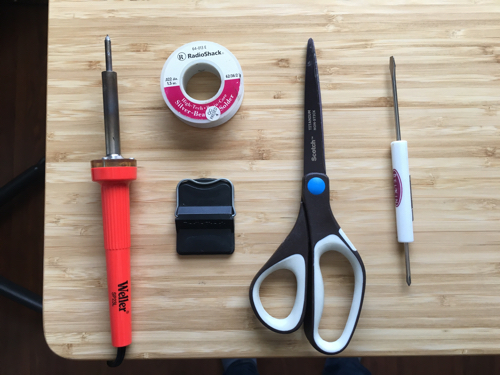
It had been a long time since I brought out my solder and iron. I had to dust them off. This was exciting for me.
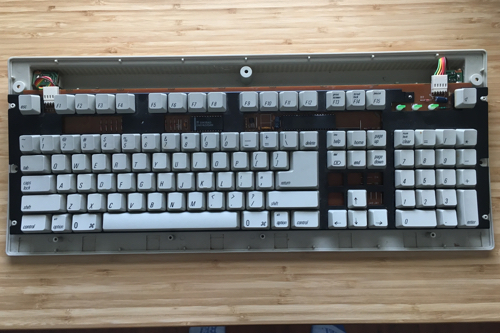
I opened up the chassis and gawked at the beautiful keyboard guts for a while.
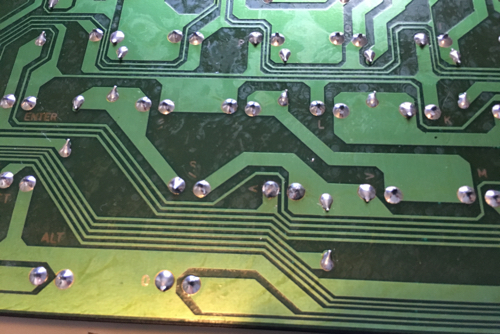
The backside of the printed circuit board (PCB) is really fun to look at for a geek like me. Each of the keys' terminals are marked with it's respective letter.
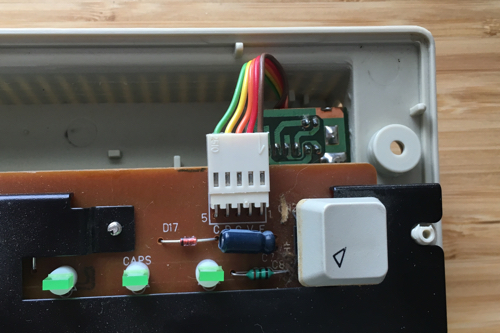
Looking a little closer, we can see the location where I would be installing the Teensy. This ADB port is on the right side of the keyboard. There's an identical port on the left side, which I would come to use later.
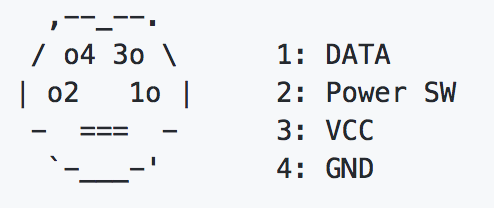
By following the diagram provided by the repo documentation, I was able to find that the yellow cable was data, the orange cable was ground, and the red cable was VCC. The other cables are not of use to the micro controller.
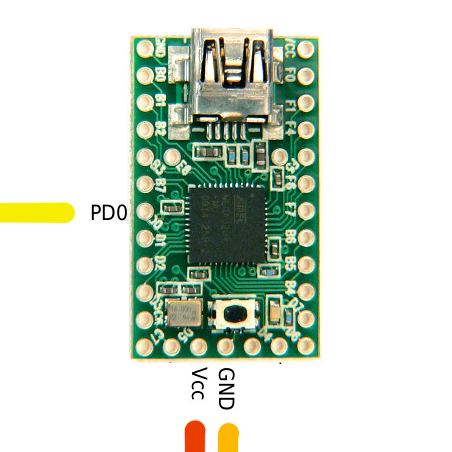
The firmware uses the PD0 port on the Teensy. This can be modified, but I didn't want to mess with the software. The diagram shows what I wanted to achieve.
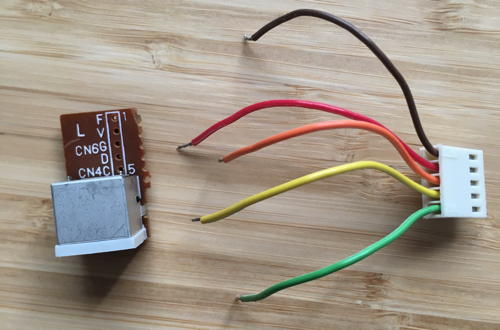
Instead of soldering the micro controller directly to the PCB, I decided to desolder the ADB port, which would leave me with a connector. Then I could solder the connector to the Teensy, and simply snap the micro controller onto the PCB with the connector.
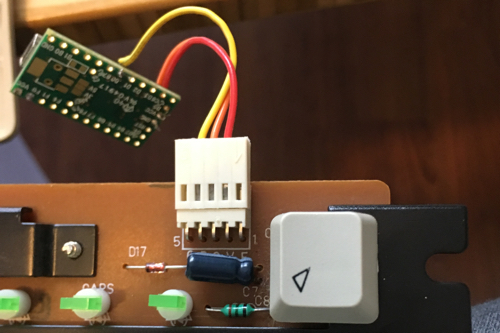
This is what the micro controller looks like when it is soldered to the connector and snapped into the PCB.
I was starting to get excited, but I wasn't quite done yet. The micro controller still wasn't detecting the key presses and I couldn't figure out why. Some sage advice is to RTFM! The documentation for the firmware explained exactly why. The data signal from the board was not strong enough for the Teensy to detect. So I needed to install what's called a pull-up resistor.

The resistor needs to connect the data and VCC cable. I'm not an electrical engineer, but I imagine it helps to amplify the data signal somehow. I phoned my buddy, Chip Doeden to request a resistor. He hooked it up and I was ready to rock. I wanted to keep the connections nice and clean, but I'm not a very good solderer. So instead of mucking up the nice micro controller connector I just made with a resistor, I thought about using the left side ADB port that I mentioned earlier. Since it's a closed circuit, it would work the same.
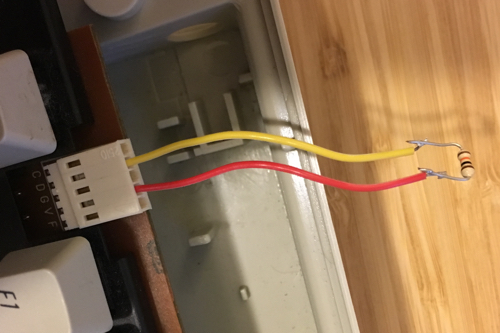
I desoldered the left side ADB connector, and used that connector solely for the pull-up resistor.
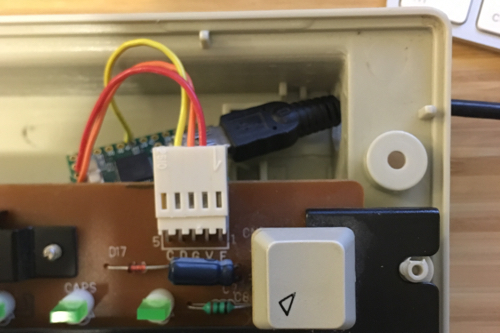
Then I wired a USB cable through the opening where the ADB port once was and I connected it to the Teensy.
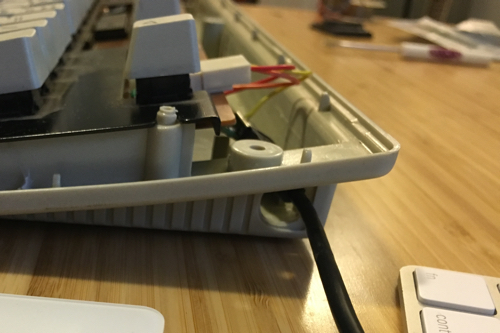
Here's a side view of what it looked like.
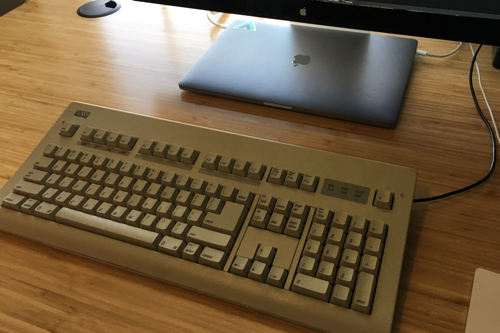
I took a deep breath, connected the USB cable to my Macbook and prayed to the serial gods.... and my prayers were answered! It really works!
Almost Buzzkill
After using the keyboard for a while, I realized that a couple of the keys weren't registering at all. The . and the 8 keys were not working. Luckily, I was able to re-solder the terminal mounts for the . key and it worked. However, for the 8 key, it turned out to be a bad switch. I solved this by grafting the keyboard's power button switch (remember those?) onto the 8 key's terminals and voilà! We're good to go!!
Upcoming Improvements
I have a few small improvements that I'm going to make to the board. I'll update with a new post for each of them.
Teensy Mount
I want to mount the Teensy so that I can plug and unplug a USB cable into the keyboard from outside the chassis. This would require that I 3D print a Teensy mount and mount the Teensy to the chassis. I will probably use the existing port holes for the USB opening instead of drilling a new one.
Colored Keys
There is a polymer die available for purchase that I can soak the keys in and it will turn the keys a specific color. I am still trying to decide on a color scheme. Recommendations are welcome!
A Custom Keycap
I'd like to 3D print a custom key cap that will add some flair to my keyboard. There are some pretty elaborate custom keycaps available. I won't go crazy though. I have a design in mind, but I'll share it when I write that post.
Success!
Now I sit here click-clacking through the day, feeling really good about having upcycled this classic piece of hardware for much less than it would have cost me to buy a new mechanical keyboard. If this post has inspired you to get creative or dust off your tools, please hit me up and let me know! Happy Hacking!